Posts

[Tip] Run Visual Studio as Administrator

Image
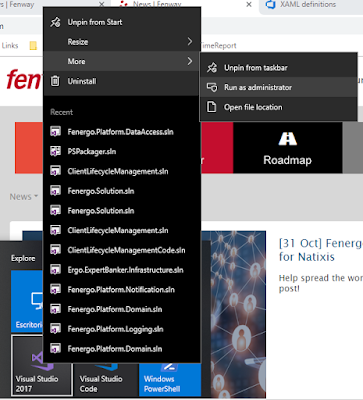
Probably you already knew this trick to run apps in Windows 10 as Administrator. If not, I hope this tip can help you. Sometimes, you need to execute Visual Studio as Administrator always, for example if you are deploying and debugging your application in your Local IIS. To execute VS as Admin there are several ways. 1) Using Sub-menus: If you go to the item in Windows menu and click on right, you will see menu "More", where you can run VS as administrator. 2) Using shortcuts: Previous method is slow, so If you don't want to do this each time you open VS, you can create a shortcut in your Desktop and execute it as Administrator. To do this, press right click on the shortcut, click on Advanced and select Run as administrator. 3) Always as Administrator: Method 2 is much better than 1, but you always have to open VS by using your modified shortcut. So for example, you can not open directly a file .sln with Admin rights. But don't worry, there is a method

Writing unit tests faster

Image
Introduction When you are writing tests, the name of the test is very important because the person who is executing the test should be able to detect what was fine or wrong at a glance. For this reason, it is a good practice to follow the convention format: TestedMethodName_InputData_ExpectedResult By using this format, we can see in a line the method to test, the input used and the result expected, so it will be easy to identify what was wrong. Another good practice is following the "Arrange", "Act", "Assert" convention ( http://wiki.c2.com/?ArrangeActAssert ), so when we are reading a test, we can identify easily each part of the test. To make more visible each part, unit test usually include one comment per each state of the test. Finally, if you are using different test categories, for example to classify unit tests and integration tests, you should use the word TestCategory("YourCategory") in your metadata definition. Using the

Debugging faster in Local IIS with Visual Studio

Image
When we deploy in our local IIS, we have to attach to the IIS process in order to debug the source code from Visual Studio.  In order to do that, we open menu Deblug>Attach to Process, and we find the IIS process, which is called w3wp and we select all the corresponding IIS processes.  This method is time consuming, but using the extension Attach to All The Things we can carry out this task faster. In order to install the extension, we open the menu Tools>Extensions and Updates, and we search the extension "Attach To All The Things". After installing this extension, we can see a new option in Tools menu with the title "Attach to IIS". With this menu we can do the attaching task only with two clicks. However, as this is a feature that you will use very often, you might want to have it in your main toolbar instead of using the menu Tools. In order to make a shortcut in your toolbar, you can add a new customized button with the following menu.

Use tabs in windows explorer with QTTabBar

Image
QTTabBar is the first application that I install when I format my computer, since it allows me to work better with Windows Explorer. Basically, QTTabBar will change windows explorer in order to use tabs, as if you were using Chrome. This comes in handy when you are working with multiple folders, as for example several shared folders, local directories, etc. Apart from using tabs, QTTabBar has a lot of options to be customized. By clicking on right button over the toolbar you can access to the options menu: In tab "Tab" you can customise the behaviour of the events. For example, this is the configuration that I use: QTTabBar also add some extra behaviour, for example if you double click on an empty space in a folder, it will go up one level. This options can be changed in "Window" tab: Additionally, there are other useful features such as merge windows into tabs. If you have several instances of windows explorer, you can merge then into

Multi-language single page applications

Image
Introduction When we are developing applications, one of the challenges is to manage several languages. In particular, I am dealing with this matter in a personal project, which is being developed using vue.js. ( https://vuejs.org/ ), so this post is focused on vue.js, but it could be used by other technologies. In order to maintain your language translations, several aspects are desirable: Easy to use. For example, if I am writing html, one tag or class should be enough to say that I want to translate a given literal. Easy to maintain. When we are writing code, we don't want to care about translations or sometimes even we are not allowed to choose a particular, maybe because it is a decision of a different department or a professional translator. Available for multiple coding languages. For example, if we are developing with vue.js, we should consider html, javascript or vue files. If we migrate our application to a different technology (like Angular), our translations

Install an SQLite database in your Xamarin app

Image
Introduction When we are developing a Xamarin application, one of the important points may be the initialization of the data for our application. To carry this out, there are different options: Download the data when opening the application for the first time Save the data in JSON or XML files Preload a SQLite database In one of my personal projects I had this situation. In the beginning, we had implemented the first option, load the data when organizing the application. The problem with this approach, the data loading can be quite time consuming and the user experience the first time the application is opened can be quite negative. In the measurements it took at the last hour. With respect to the second option, load the data of a JSON, it solves the issue of the issue of the heavy load time, and that the JSON is installed as a resource next to the application. The downside of this is that it is not a highly optimized format when making queries and also the size of

Improvement in the Test Explorer for Visual Studio v15.7

Image
The next Visual Studio update (v15.7) will include an improvement in the Visual Studio Test Explorer that will allow us to see the best organized tests. So far we are seeing them like this: And with the improvement we can see them organized in a hierarchical way, grouped by project, namespace, class and method. This will also facilitate the execution of a set of specific tests (for example if we only want to launch those of a specific class). This is how the explorer test will look in future versions: Although in Visual Studio the test categories already existed ( https://msdn.microsoft.com/en-us/library/dd286683.aspx ), it is good news that by default we are grouped together in a much more practical way. This information is based on the article https://blogs.msdn.microsoft.com/visualstudio/2018/03/21/visual-studio-2017-version-15-7-preview-2/ and since it is not a version in production, you might experience some changes. Happy coding!!